The humble coaster that started out as just a barrier between drinks and furniture has now become an essential part of home decor and table settings. Finding a coaster design that complements the other decor pieces of the home as well as the aesthetic preferences of the homeowner can sometimes become a daunting task. The simplest thing to do here is to make a DIY coaster that fits your needs perfectly, is fun to make and is super cheap.


7 DIY Coaster Ideas
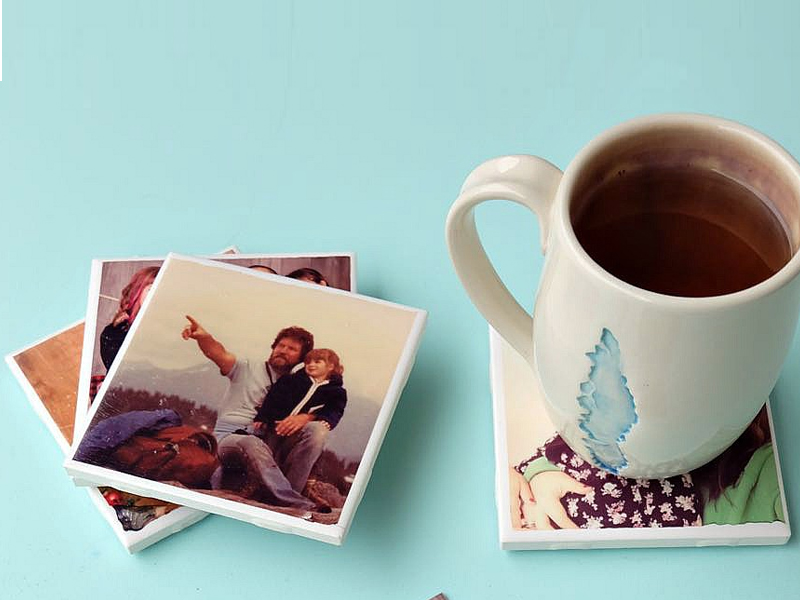
1. DIY Photo Coasters:
How great would it be to relive your favourite memories while sipping on your favourite drinks? These photo coasters allow you to do just that. Such handmade coasters also make for wonderful presents for your friends and family.
You Will Need:
- Printed photographs
- 4X4 inch tiles
- Craft glue
- Glue gun
- Epoxy resin and hardener
- Felt cloth
- Scissors
- Mini torch
- Nail file
Method:
- Cut the photographs to a size that is slightly smaller than the size of the tiles.
- Use the craft glue to stick a printed photograph on the centre of one tile and leave to dry.
- Mix the epoxy resin and the hardener in equal quantities.
- Using a plastic spoon, pour a little resin into the centre of the photograph. Use the back of the spoon to create a thin layer of resin covering the photograph.
- If you see small bubbles on the resin, you can use a mini torch to get rid of them.
- Let the resin dry overnight.
- Smoothen the edges of the DIY coaster with a nail file.
- Use the glue gun to stick the felt cloth to the bottom of the coaster.
- Repeat the same process on all tiles.
2. Bead Coasters:

Many of us have a container full of leftover assorted glass beads from previous DIY projects. Even if you don’t, these beads are inexpensive and easily available in any craft store. Just choose the colour/colours of beads that will look best with your home decor (or use multiple colours for a kaleidoscopic effect) and you can make a quirky handmade coaster for your drinks.
You Will Need:
- Glass beads (quantity will depend on the size and number of your coasters)
- Nylon thread or fishing line
- Glue gun and craft glue
- Cork rounds
- Scissors
Method:
- Start by stringing your beads into the nylon thread/fishing line. You should need approximately 70 inches of thread per coaster.
- Secure the thread/fishing line on both ends by tying knots.
- Apply little glue from the glue gun to the centre of a cork round and stick one end of the beaded thread/fishing line to it.
- Wait for the glue to dry.
- Apply craft glue in sections and stick the beaded thread/fishing line in a spiral pattern. Continue the process until the entire surface of the cork round is covered with the beads.
- If you have excess beaded string, wait for the project to dry completely before cutting it off.
- Place a cloth or paper followed by a book to ensure that the coaster remains flat.
- Repeat the process for the other cork rounds.
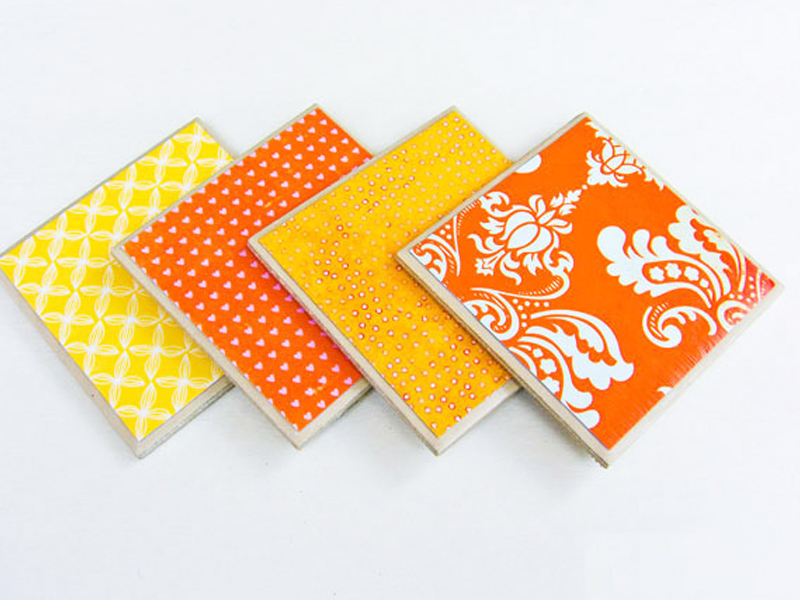
3. Tile Coasters:
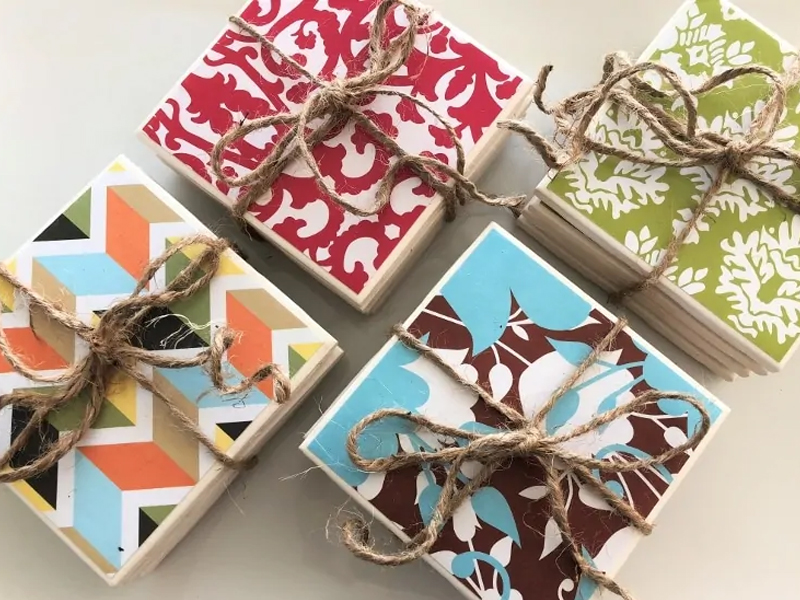
These tile coasters can be easily made with only a handful of materials. This is amongst the resin coaster ideas that provide a great opportunity for showcasing your creativity as they can be made with any kind of paper. They are a great way to make use of old sheets of wrapping paper, old newspapers, comic book pages and even crossword puzzles.
You Will Need:
- 4X4 inch tiles
- Decorative paper
- Glue
- Mod podge
- Glue gun
- Felt cloth
- Clear spray paint
- Scissors
Method:
- Cut the decorative paper into 3.8 X3.8 inch squares.
- Stick the paper on top of the tiles with glue and leave it to dry.
- Apply a layer of mod podge over the coaster and let it dry.
- Repeat the process two more times, allowing it time to dry before the next application.
- Stick felt cloth to the bottom of the coaster.
- Finish the coaster by spraying it with clear spray paint for a glossy finish. Leave to dry.
- Repeat the process for the remaining tiles.
4. Resin Coasters
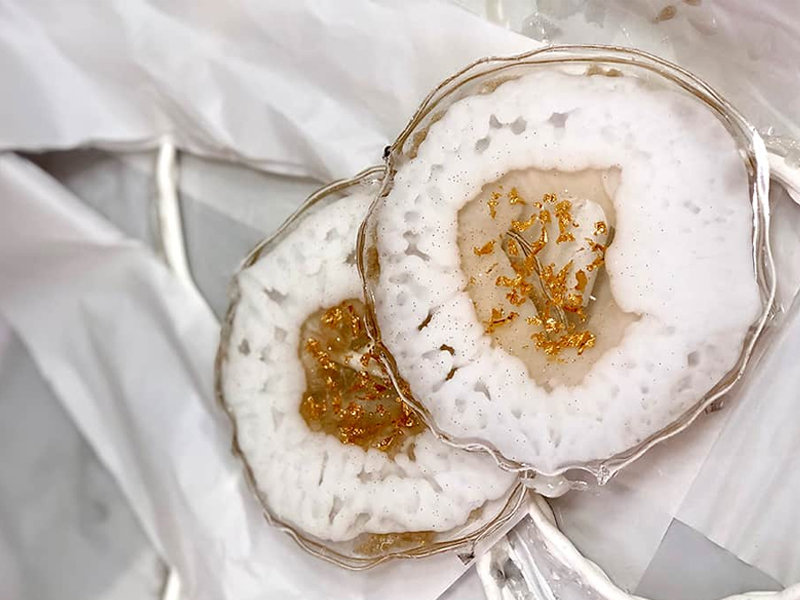
Resin art is becoming increasingly popular when it comes to home decorations. While these gorgeous pieces look intricate and skilful, a resin coaster DIY is relatively easy to pull off. Making your own resin coasters allows you to use your creativity and come up with a product that reflects your style best.
You Will Need:
- Clear epoxy resin and hardener
- Coaster moulds
- Twigs/dried flowers/leaves
- Mixing cup and stirring stick
- Mini torch
- Nail file
Method:
- Cover your working table with thick plastic and wear your gloves.
- Carefully mix the resin and the hardener with a stirring stick in equal proportions for 2 minutes until completely mixed.
- Pour the mixed resin into the coaster moulds and let it dry for 20 minutes.
- Now use a mini torch to get rid of any bubbles on the surface of the coasters. Remember to keep moving the mini torch to prevent too much heat in one spot.
- Gently add the twigs/dried flowers/leaves to the coasters. Let them sink into the resin.
- Leave the coasters to cure overnight.
- Unmould the coasters and file away any rough edges.
5. Wood Coasters:

These DIY wood coasters are the ideal choice for people who are attracted to rustic home decor. Making these coasters can be a great way to involve your kids in creative activities as they are extremely simple and quick to make.
You Will Need:
- Icecream sticks
- Washi tape
- Scissors
- Glue
- Clear spray paint
Method:
- Lay the ice cream sticks next to one another till you reach the desired coaster size.
- Place two ice cream sticks diagonally on the coaster and stick them using glue. Leave to dry.
- Now flip the coaster and apply washi tape to the coaster in a pattern of your choice.
- Spray clear paint to finish the coaster.
- Repeat the process to make more coasters.
6. Macrame Coasters:

Macrame is the art of knotting threads together to make interesting patterns. These DIY macrame coasters will look great on your bedside table or coffee table. The coasters are made using a basic knotting technique which is very simple to understand and takes barely any time to finish once you get the hang of it.
You Will Need:
- Macrame cord
- Ruler
- Scissors
- Pet brush
- Needle
Method:
- Cut one string of the macrame cord measuring 5 feet.
- Cut 5 macrame cord strings of 30 inches each.
- Take the string measuring 5 feet and make a round loop on one of the ends.
- Take one of the 5 strings and fold it in half.
- Place the string folded in half under the prepared loop and pass the loose ends through it, attaching the string to the loop in a lark’s head knot.
- Repeat the same process for the other 4 strings so you have all five strings attached to the loop.
- Pull on the loop to close the gap in the centre.
- Now take the end of the 5 feet string and place it on top of the first of the five 30-inch strings.
- With the left string of the 30-inch string, make a 4 sign and pass the right string from below it.
- Repeat this process one more time.
- Continue this pattern with the remaining four 30-inch strings. Remember to keep using the 5 feet string as the base.
- Keep repeating these rows till you reach the desired size of the coaster.
- Pass the loose end through the last row, tie a knot and snip off the excess.
- Use a pet brush to make fringes of the leftover macrame cord on all sides.
- Trim the excess.
- Repeat the same process to make additional coasters.
7. Painted Coaster

These painted coasters are the perfect piece of art you need for your coffee and dining table. You can choose the intricacy of the paint pattern depending on your painting skills. There are numerous coaster painting designs one can choose from that make incredible coasters. Many of them are so simple that even kids can make them easily. The chosen coaster painting ideas will determine the kind of tools and colours to be used for making these coasters.
You Will Need:
- Cork rounds
- Earbuds
- Acrylic paint (yellow and white)
- Clear spray paint/varnish
Method:
- Dip the ear bud in yellow acrylic paint.
- Make scattered dots on a cork round for flower centres, keeping space for the petals.
- Dip another earbud in white paint and make petals for every yellow dot.
- Let the paint dry completely.
- Use clear spray paint or varnish to finish the coaster.
- Repeat the coaster painting process on all cork rounds.
Whether it is a simple tile coaster, a painted cork coaster or an intricate macrame coaster, using a coaster that is made by you adds a special touch to your home decor. Making these coasters enables you to create unique pieces for the home which are not only things of beauty but also have great utility value. If you are unsure about making a DIY coaster from scratch, you can also start by trying simple coaster painting ideas on your existing coasters.