

Kids’ world is full of science, everywhere they look! And rightly so. Science is a part and parcel of our lives. It is something that everybody should be versed in. Learning basic science concepts helps us make sense of the world around us, allows us to make informed decisions, live a safer life, and improve critical thinking. In children, learning of science kindles inquisitiveness and in turn, makes them smart and well-rounded.
The best way to learn the basics of science is by having hands-on involvement with simple experiments to do at home using everyday household material.
So, to make them enjoy both science and the lockdown, we’ve curated a list of simple science experiments that can be done with kids at home. These are the coolest science experiments we have tried that are unique, magical, and use only household items. Let’s have a look at them!


10 At-Home Fun Science Experiments To Do With Your Kids
1. Rain Cloud In A Jar
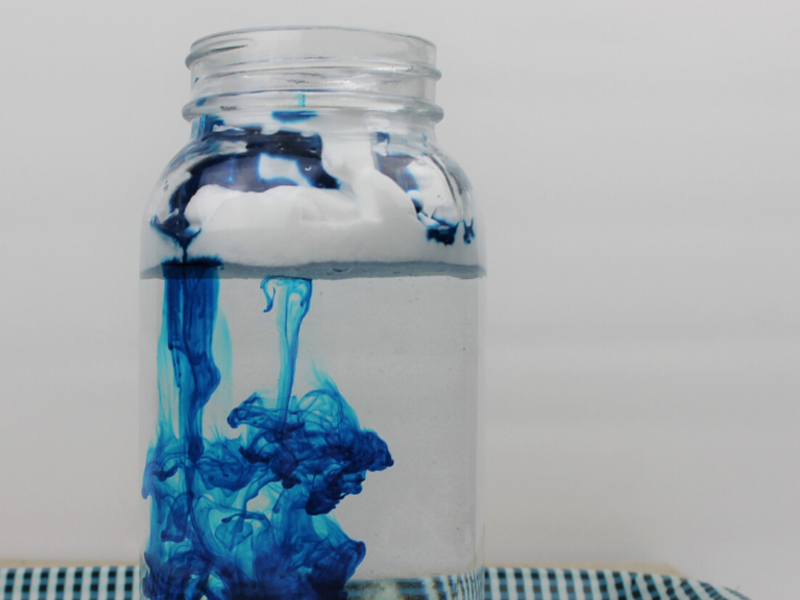
Making a rain cloud in a jar is a fun and easy way to teach children how it rains. Kids will love the magical ‘wow’ factor and you’ll love the easy prep!
You Will Need:
- 1 x see-through glass jar or a long glass
- tap water
- shaving foam
- blue food colour or watercolour
- a dropper
Method:
- Fill your jar about three-quarters full with water (this depicts the air).
- Use the shaving foam on top of the water (this depicts the clouds).
- Once you’ve made a fluffy ‘cloud’ on top of the water using shaving cream you are ready to get to the fun part: making it rain!
- Let the foam settle a bit.
- Now drop food colour into the ‘cloud’ (depicting water droplets).
- Wait for the ‘rain’ to fall.
As you drop more coloured drops into the cloud, your cloud fills up and the cloud becomes heavier and heavier and the food colour drops fall through as rain!
The science behind this:
Clouds are formed when water vapour rises into the air and condenses onto tiny particles of dust. When billions of these droplets come together, a visible cloud forms. Explain to your child that when water droplets grow heavy enough in the sky, gravity pulls them down from the clouds as raindrops, just like in the experiment.
Making a rain cloud in a jar is obviously a simplistic model of how it actually rains, but this rain cloud experiment also gives young children a hands-on visual that is extremely valuable to their learning. Plus, it’s fun!
2. DIY Tornado

Another interesting way to learn about the weather. It’s a quick and simple experiment to do at home and is amongst our go-to choice when we want to have some science fun! In just a few minutes, with the use of everyday things, kids will be able to create their own miniature tornadoes.
You Will Need:
- Mason jar
- Water
- Dish soap
- Vinegar
- Glitter (optional)
Method:
- This exciting activity requires you to fill 3/4 of a clean jar with water, add soap and vinegar, close the lid, and swirl.
The science behind this:
The spinning of the jar forms a vortex at the centre and the centripetal force makes the water spin around that vortex like it happens when a tornado occurs. You can change the strength of the vortex depending on how quickly you swirl the jar.
3. Fizzy Volcanoes
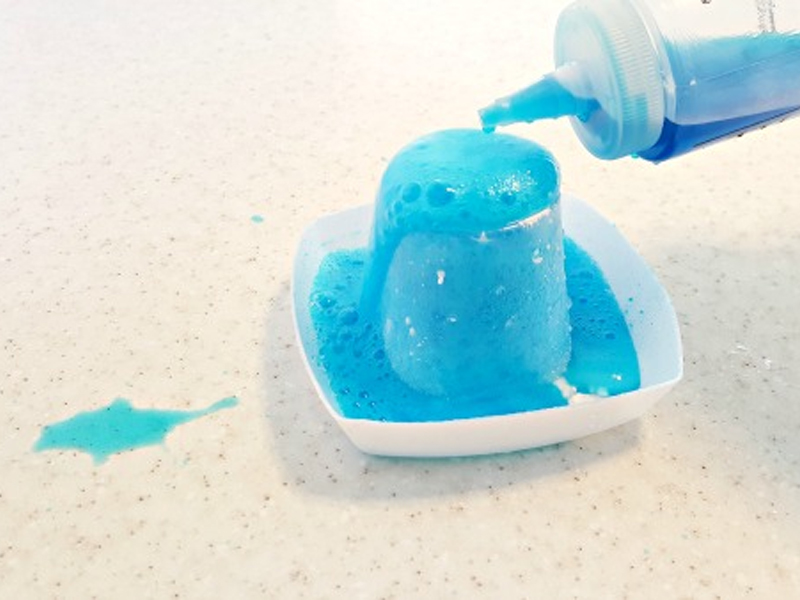
Fizzy volcanoes are one of the classic science projects for kids, and they’re also one of the most popular. It’s hard to top the excitement of a volcano erupting inside your home. This experiment can also be as simple or in-depth as you like. For the eruption, all you need is baking soda and vinegar (dishwashing detergent adds some extra power to the eruption), but you can make the “volcano” as elaborate and lifelike as you wish.
You Will Need:
- Safety glasses
- Baking soda (about 2 tablespoons)
- Vinegar (about 100 ml)
- A clear bottle or mason jar (about 500ml)
- Liquid dish wash gel (just 10 ml)
- Water
- Playdough or aluminium foil to make the “volcano”
- Additional items to place around the volcano (optional)
- Food colouring (optional)
Method:
- Using playdough, make a volcano-like structure around the bottle. You can create the setup by adding some other materials also like sand, rocks, pebbles. See that the bottle is covered from the sides and not the top.
- The first step is to pour in the warm water. Fill the bottle until it is about half full.
- Add the washing-up liquid. Then add the vinegar and food colouring.
- Now, add the baking soda, stand back and watch as your volcano erupts!
Note: This experiment can be messy, especially with the addition of food colouring. Choose a location where spills do not matter. Adult supervision recommended.
The science behind this:
A chemical reaction between vinegar and baking soda creates a gas called carbon dioxide. Carbon dioxide is the same type of gas used to make the carbonation in sodas. What happens if you shake up a soda? The gas gets very excited and tries to spread out. There is not enough room in the bottle for the gas to spread out so it leaves through the opening very quickly, causing an eruption!
4. Walking Water
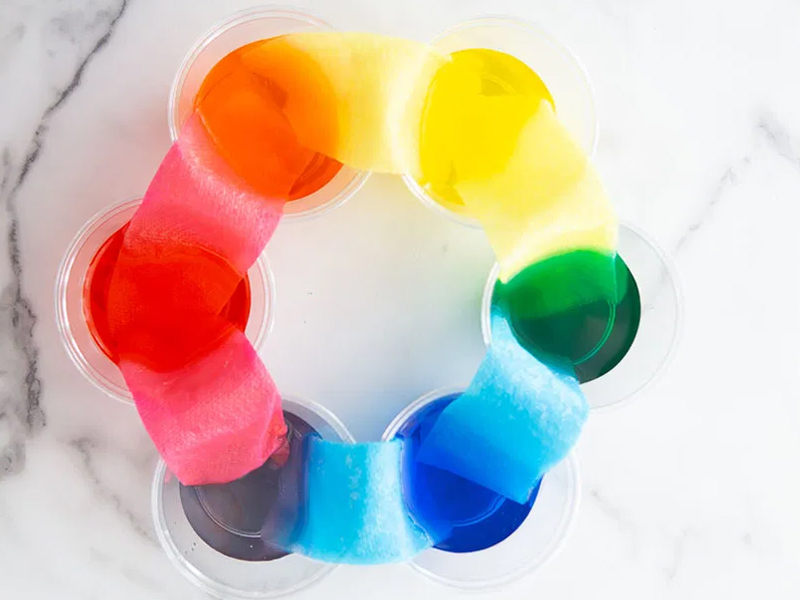
The ‘walking water’ science experiment is a fun and easy way to engage children to learn. It shows them how capillary action works and the results are immediate. It’s such a fun way to teach kids STEAM.
You Will Need:
- 5 transparent glasses
- Food colours (preferably different colours)
- 4 Paper towels
- Water
Method:
- Place 3 glasses with water filled up almost to the top and add 6-7 drops of different food colour in each glass.
- Next to each glass of coloured water, place an empty glass (place them as coloured-empty-coloured-empty-coloured).
- Fold paper towels a few times and tear in the middle to make small rectangles
- Place one end of each paper towel rectangles in a glass with coloured water and another end into an empty glass. Do the same till all the glasses are connected.
- Make sure all of the glasses are joined and watch as the water walks from one glass to another (you may leave it for 30 minutes and then come back to see the magic).
The science behind this:
Have you ever thought about how water travels inside plants from roots all the way to the leaves? It is possible because of a process called capillary action. And this is what we see in this experiment too. Water is traveling through small air gaps inside paper towels that act like tubes connecting our glasses and mixing our colors.
5. Ice Picking String Experiment

If you are wanting to wow kids with this magical science experiment, hold up your “oohs” and “wowws” first!
You Will Need:
- Ice cubes
- Water
- Salt
- A string
Method:
- Simply put some ice cubes in a bowl, cover them with water, place the string on top (make sure it’s touching the ice) and sprinkle some salt on top.
- Let it rest for 30 seconds.
- Lift the string up.
- The ice should have been stuck to the string by then.
The science behind this:
What happens here is that salt dissolves in a thin layer of water above the ice. Salty water has a lower freezing temperature comparing to freshwater, so it makes ice melt, absorbing the heat in the process. Ice takes some of that heat from water causing it to freeze back again trapping the string.
6. Magic Milk Color Mixing
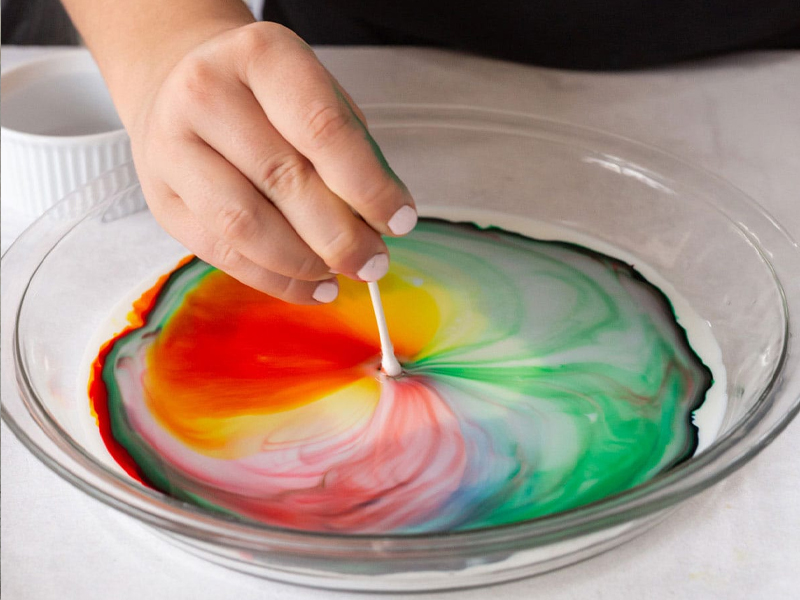
This experiment never gets old. Plus something really fun to do with expired milk! It is also a great way to explore primary colours in this magic milk twist.
You Will Need:
- Full fat milk
- Food colouring: red, blue, and yellow
- Dish soap
- Q-tips or cotton balls
Method:
- Add a thin layer of milk to a plate or bowl.
- Grab two colours of food colouring and add a few drops to the milk. You want it to stay in drop form as much as possible so don’t mix it.
- Dip the q-tip in the dish soap and lightly tap the milk with food colouring. Leave it steady and watch the milk move around on it’s own making the colors mix.
- Once the milk stops moving, use the q-tip to mix the colours together making a new colour out of the two you added.
The science behind this:
The key to the dancing colours in this experiment is soap and the concept of “surface tension”. Soap molecules consist of a hydrophilic (water-loving) end and a hydrophobic (water-fearing) end. Milk is a mixture of water, fat, vitamins and minerals. When soap is added to the milk, it helps to separate the water and fat in the milk. When soap is mixed in with the fat and water, the hydrophobic end of the soap molecule breaks up the nonpolar fat molecules, and the hydrophilic end of the soap molecule links up with the polar water molecules. Now that the soap is connecting the fat and water, the nonpolar fat molecules can be carried by the polar water molecules. As the soap molecules connect to the fat molecules, the molecules of the food coloring get pushed around everywhere resulting in an explosion of colour!
7. Oobleck
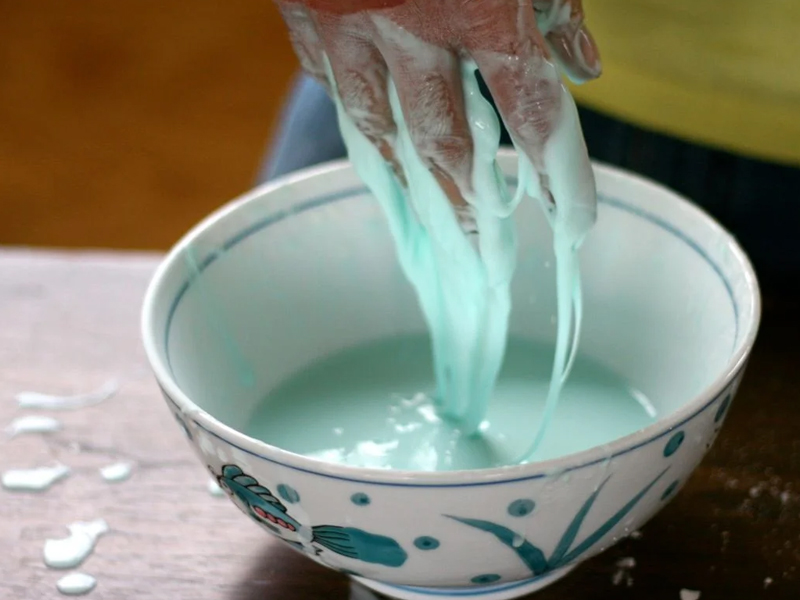
This science experiment is a typical example of how an everyday item is truly magical yet goes unnoticed in our kitchens!
You Will Need:
- 2 small cups of cornstarch
- 1 small cup of water
- Food colouring of your choice
- Glitter (optional)
- Tray
Method:
- Mix all the ingredients into a tray together.
- You will get a suspension that acts like a solid when you put pressure on it, but then it can flow like a liquid.
- It feels like the snow that melts away so quickly.
- This is perfect for messy play at any age.
- You can add some food colouring and glitter to make this melting snow extra magical!
The science behind this:
Oobleck is a special type of slime with properties of both liquids and solids. If you squeeze it, it feels solid (viscosity increases when you agitate the slime or apply pressure), yet if you relax your grip, it flows through your fingers. The starch grains remain intact rather than dissolving, which is the key to the slime’s interesting properties. When a sudden force is applied to oobleck, the starch grains rub against each other and lock into position. The phenomenon is called shear thickening and it basically means particles in a dense suspension resist further compression in the direction of shear. When oobleck is at rest, the high surface tension of water causes water droplets to surround the starch granules. Water acts as a liquid cushion or lubricant, allowing the grains to flow freely. The sudden force pushes the water out of the suspension and jams the starch grains against each other.
8. Rainbow Colour Gems

This experiment is easy, low cost and provides lots of investigative opportunities. It is a fun and easy way to teach children about mixing colors and creating new colors. This is also the perfect experiment to teach your students how sugar dissolves when mixed with warm water.
You Will Need:
- A flat plate or dish
- Gems or M&Ms or Skittles
- Water
Method:
- This simple science experiment requires very little preparation.
- Simply, arrange the Gems in a circle near the edge or rim of a glass or plastic plate. Try to alternate the colours.
- Carefully pour water into the centre of the dish till the water started reaching the end where gems have been placed.
- Watch what happens. Within seconds, the colors begin to move toward the center of the plate.
The science behind this:
The chocolate inside of Gems is covered by a hard, crunchy shell that is made up of sugar and the different coloured dye. When the warm water mixes with the sugary shell, the sugar dissolves and the different colored dye begins to run and blend. The colour and sugar dissolve into the water and then diffuse through the water, making it the colour of the skittle.
9. Magic Balloon

How can we have our top favourite experiments without even a mention of balloons!
Balloons come really handy when exploring science with kids at home. And this magic balloon experiment is yet another favourite of ours.
You Will Need:
- Empty plastic bottle
- Scoop spoon
- Funnel (optional)
- Baking soda
- Vinegar
- Balloon
Method:
- Pour approx 15 ml vinegar in the bottle. Keep aside.
- Now, add 1 scoop of baking soda into the balloon using a funnel.
- Gently fit the balloon over the mouth of the bottle ensuring that the baking soda doesn’t spill in as yet.
- Now lift the ballon to allow the baking soda to fall into the bottle and witness the magic.
Note: Adult supervision recommended
The science behind this:
When vinegar and baking soda mix, a chemical reaction takes place. Carbondioxide gas is released which fills up the balloon and results in inflation of the balloon.
10. Rising Candle In A Water Jar

This breathtaking experiment is easy to do at home with your family.
You Will Need:
- A plate or dish
- Tea candle
- A big vase or jar
Method:
- Just light a tea candle and place it at the centre of a plate with water.
- Cover the candle with a jar or a vase for a more dramatic result.
- Use a larger jar to make sure more water gets sucked into it.
Note: Adult supervision recommended
The science behind this:
It has everything to do with the difference in the volume of hot and cold air. The candle heats the air inside the vase, it expands, and it leaves the vase – you can see it bubbling in water. But after the candle burns all the oxygen inside and it goes off, bit by bit the air inside starting to cool down. Cool air takes less space, so when it shrinks, it sucks in whatever is available (that is, water).
Kids love exploring their world and these simple experiments can help guide their natural curiosity and teach the basics of scientific methods. The best part- these cool science experiments can be easily done at home and feel more like play, hence great boredom busters.
Go Mommy!


")


