

Scrolling through social media, we all come across a ton of beauty content with endless hacks, tips, and techniques. But how do you know what works best for you? Fret not, because this guide has got you covered. From secrets about hairstyling to steps to ace makeup to skincare hacks, the more beauty tips you have in your arsenal, the better you’ll be prepared to handle every situation thrown at you. Here are the top tips every beauty lover should know.
5 Must Know Desi Nuskhe For Oily Hair During Monsoons
With the onset of monsoon, comes a variety of hair concerns. The unnecessary stickiness in hair due to rain causes clingy or frizzy hair and hair fall. You can reap the benefits of locally available ingredients to whip up natural and gentle oily scalp treatment. Here are 5 ingredients from your kitchen or garden that will help you make easy home remedies for an oily scalp. Know everything about oily scalps here.
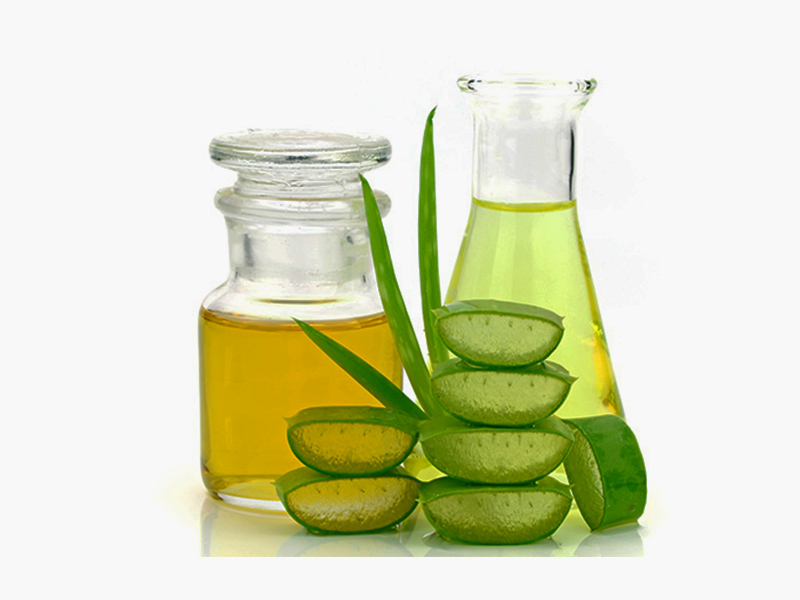
1. Aloe Vera Gel

Aloe vera is the holy grail of skin and hair care and is loved for its moisturising effect. Using aloe vera for hair will help moisturise and calm the scalp while helping to get rid of build-up. A moisturised scalp will produce less oil and will make your hair look healthier.
How To Use It:
- Take some natural aloe vera gel and generously apply it as a mask to your hair.
- Leave it on for 30 minutes before washing it with a mild shampoo.
2. Cornstarch

When you are in a hurry, dry shampoo is one of the best oily hair remedies. But if you do not have it, cornstarch is the next best thing. It may sound weird, but you’ll be surprised by how effective it is!
How To Use It:
- Rub it into your oily scalp for a less greasy look.
- If you have dark hair, mix it with cocoa powder to prevent a whitish appearance.
3. Oatmeal

The thick consistency of oatmeal is great for absorbing excess oil from hair. It also has anti-inflammatory properties that are soothing for an irritated scalp.
How To Use It:
- Cook some oatmeal and let it cool.
- Then apply it like a mask and leave it on for 20 minutes before rinsing properly.
4. Tea Tree Oil

If your oily hair is caused by dandruff, tea tree oil can help alleviate it.
How To Use It:
- Mix 15 drops of it with 30 ml of light carrier oil (like coconut or almond).
- Massage it into your hair and leave it on for an hour before washing.
5. Egg Yolk

Egg yolk is rich in protein and fatty acids. It will provide the much-needed moisture to your scalp so it doesn’t overproduce its own.
How To Use It:
- Whip it up in a bowl and apply it to the hair as a mask.
- Don’t let it dry all the way. When it is of a gel-like consistency, wash it off with cool water.
The 5 Most Popular Hairstyling Techniques
The following are five popular hairstyling techniques experts use to create those jaw-dropping, unforgettable hairstyles. No matter how you choose to style your hair, getting a quality look is easier than you think. All it takes is some knowledge and confidence, and you’re on your way to getting that salon-quality look! Also, find here 30 DIY hair masks to make every day a good hair day!
1. Getting The Haircut Style You Want
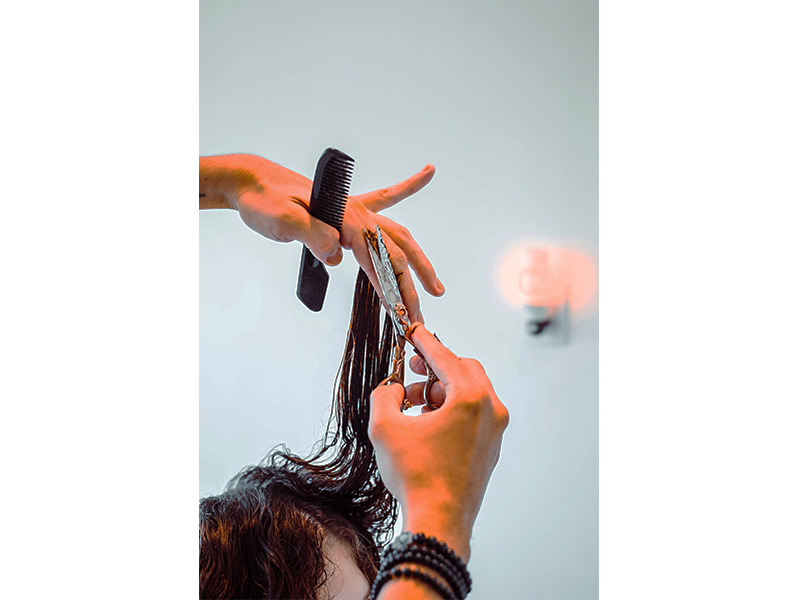
From pixie cuts to long layers, a good haircut is the foundation for any hairstyle. Consider your face shape and if the cut you want will complement that shape. A good haircut will highlight those positive features and downplay those less-than-positive features.
2. Adding Some Colour

Another easy and sometimes cheap way to change up your hairstyle is to add in some colour. Nowadays, there are plenty of excellent hair dye products out there in almost any colour you can think of. If you’re ready to get creative and think outside the box, colouring your hair might just be for you.
3. Mastering The Blow-Dry

A simple wash and blow-dry can be the easiest way to get a great hairstyle. So, how do you get that great blowout without blowing out your wallet? Use the right hairbrush and dry your hair in sections (if you have bangs, dry those first). Starting with the side sections, take half of the section and pull it taut with your round brush while aiming the blow dryer at your roots. Repeat until the section is dry. Finish the other side and end with the top. Don’t rotate the brush too much as it can cause tangling. Finish up with a quick blast of cold air to calm the frizz.
4. Creating Great Curls
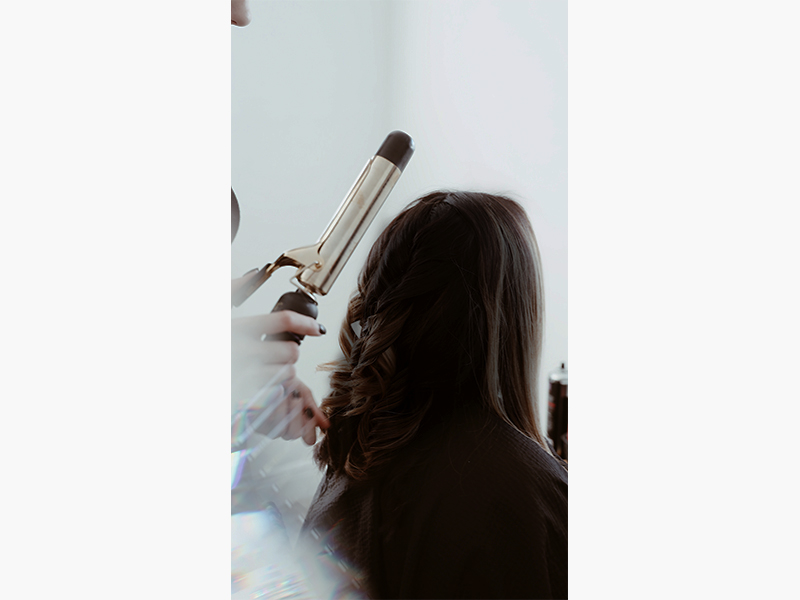
A head full of glamorous curls is one of the most classic looks. Ensure your hair is completely dry and use the right size curling iron. Don’t just crank your curling iron settings up to the highest level. Depending on your hair’s texture and health, you need to watch the temperature setting. You should only hold your hair in the curling iron for around 8 to 10 seconds, more if you have thicker hair. Just make sure you don’t go over 15 seconds.
5. Straighten It Out

Sometimes you just want that sleek, straight look. Straight hair is an excellent choice for those with shorter haircuts, and unless your hair is naturally straight, the best way to get that straight hair is with a hair straightener. Straightening wet hair can cause damage, so if you’re going from shower to styling with your freshly washed locks, blow dry first. Keep the temperature down and use a heat protectant. Take small sections of hair, pull them taut, and run the flat iron from your roots to the ends. Here’s how to clean hair brush (or a comb) quickly and efficiently.
10 Basic Hairstyles Every Woman Can Try
One of the best feelings is coming out of the hair salon with your hair freshly cut and styled. You feel beautiful and confident, and it can put an extra pep in your step. However, since the lockdown, you need to do your best sitting at home. Here are some very easy yet stylish techniques, tips, and tricks that you should follow to look chic and beautiful without trying very hard. Click here and guarantee a good hair day every day with these easy-to-do hairstyles that can instantly elevate your look!
1. The Classic Ponytail

You can never go wrong with a classic ponytail. This hairstyle has been around for decades. Looking for hairstyles to oomph up your already beautiful wavy hair? Check here some amazing hairstyles that you must try.
How To Do It:
- Separate your hair in two sections horizontally from the crown.
- Adorn the back hair with a ponytail and again part the front hair into two sections.
- Now pull one section of the front in the backside, wrap it around the hair tie and secure it with 2-3 hairpins to cover the elastic.
- Repeat this process for the rest of the front part and enjoy an effortless classic ponytail.
2. Pony Wrap

A variation of the classic ponytail is this modern pony wrap and it is as easy to make as the classic ponytail. Looking for hairstyles to keep you looking easy, breezy, and chic in the monsoon? Here are 12 easy breezy hairstyles that will help you look your absolute best.
How To Do It:
- Section your hair and do a ponytail as you would do for the classic pony; the trick is that instead of parting the front strands, you will pull all of them together to the back.
- Wrap it around the pony until there is no hair left.
- Secure it with pins for a stronghold.
3. The Half Bun

Feeling lazy? But still, want to rock a fresh and trendy hairstyle? Then this half bun style is the right one for you. This modern-day style requires very little time to create but yet it gives you a very bomb look.
How To Do It:
- Start with sectioning your hair into two parts, the bottom part, and the crown part.
- And then create a bun with the crown hair. Be sure where you place the crown bun because the misplaced bun will end up making you look like a sumo wrestler rather than a modern rock star.
4. The Mega Volume Double Pony
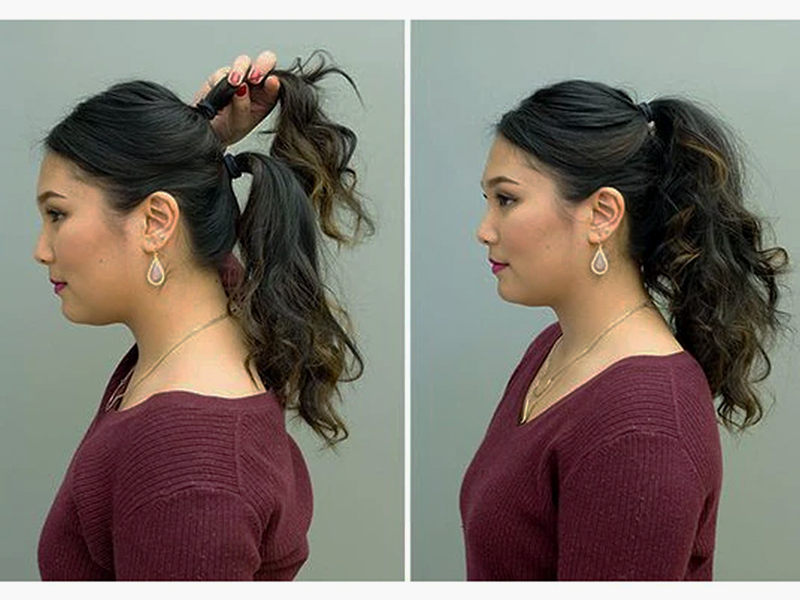
With its height and extra length, this voluminous ponytail is anything but meh. This hairdo is very easy and perfect for medium to long hair.
How To Do It:
- Section off your manes and pull the upper portion above your ears for a half-up, half-down ponytail and let the other part of your tresses hang loosely below.
- Now with the rest of the locks construct another ponytail a bit below the first one.
- Then using a fine-tooth comb, tease the top ponytail to create fullness.
5. Style With Hot Rollers
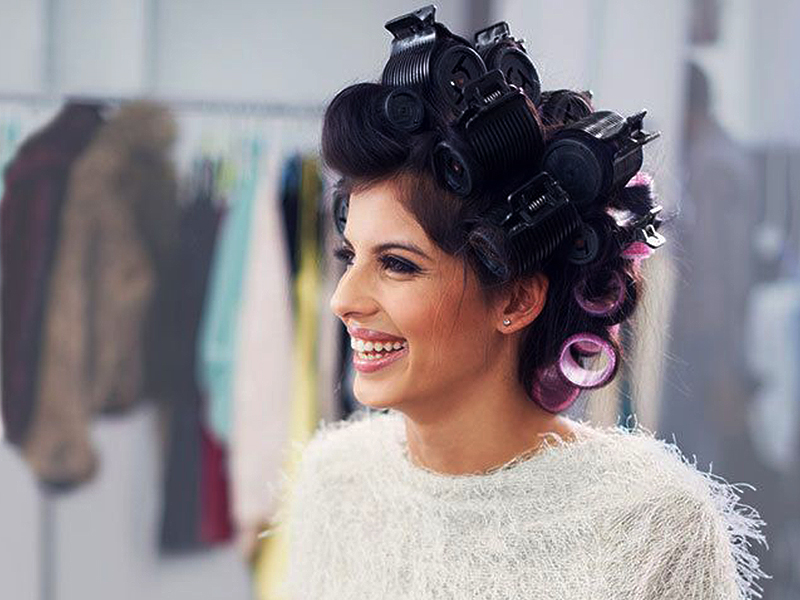
Putting on the rollers is somewhat simple, but most people mess up at the sectioning part. Want to change your look and try something new with your hair? Find here some steps to get salon-like fancy hairdos from the comfort of your home.
How To Do It:
- For effortless styling, section your tresses into four parts (top, middle, and 2 middle bottoms) and put in the relatively big rollers in the top section if you want more volume on the top.
- Set the rest of the rollers by sections for an uncomplicated styling experience.
6. Flat Iron Curls

If you have short hair (neck length) and you still want to adorn them with curls and waves but they are just not long enough to wrap around a curling iron barrel then there is nothing better than a straightening iron to style your tresses.
How To Do It:
- Take a ½ inch section of your hair and place it between the plates of a 1-inch or less flat iron.
- Now twist the tool and hold it for a few seconds in place before slowly gliding it downwards.
- Remember that the slower you glide the straightener, the tightened the curls.
Note: Don’t get frustrated if you don’t achieve the look you intended on the first try; practice makes perfect and so keep practising and soon you will learn the technique yourself.
7. The Fishtail Braid

The fishtail braid may seem hard but if you know the right technique, this stylish hairdo is as easy and quick as a ponytail.
How To Do It:
- Begin by pulling back all your tresses and tie them with a rubber band to a ponytail.
- Then divide this ponytail equally. Now grab a piece of hair from one section and pull it to the inside of the opposite section.
- Follow the same technique for the other part also.
- Continue this process until you run out of hair and find out that you have finally adorned your manes with a classic fishtail braid.
- Secure the braid end with a band and spray on some holding spray.
8. Modern Messy Bun
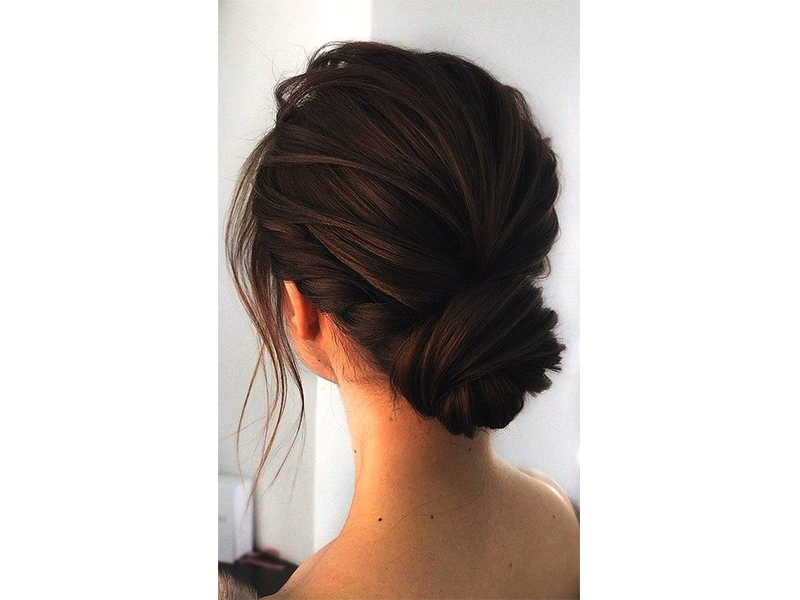
The messy bun is a very popular hairstyle among modern girls, but you have to know the perfect way to make it look messy and effortless.
How To Do It:
- First, comb your hair and construct a high ponytail and then start twisting the length of your hair around the ponytail to form a bun.
- Now, using bobby pins secure the bun for better hold.
9. Bandana Braid

Scarves and bandanas are exceptionally popular when it comes to choosing hairstyles. Not only do they add a pop of colour to the hairstyle, but they also protect the hair from the harsh sun.
How To Do It:
- Fold the bandana into half, creating a triangle.
- Now fold the triangle until it starts looking like a roll of fabric.
- Take all your hair on one side of the face.
- Start creating a simple three strands side braid.
- Add the bandana to any one of the three strands of the braid and continue to braid till you reach the end of the hair length.
- Secure the braid with a band.
10. Hairstyle With A Headband

Headbands are a girl’s true best friend. They keep the hair out of your face and help you get a unique look as they are available in so many patterns and designs. This hairstyle is a quick way to wear your headband stylishly without having to leave your hair loose on a hot sticky day.
How To Do It:
- Part your hair in the middle.
- Take thin sections of hair from each side of your face and secure them with clips/bands.
- Wear a headband just behind these sections.
- Make a low ponytail with the rest of the hair. Secure with a band.
- Unclip the section on one side of the face and twist the hair.
- Take this twisted section to the back of your hair and wrap it around the ponytail, starting from the opposite side.
- Repeat the process on the other side.
8-Step Guide To Ace Your Face Makeup Like A Pro In Monsoon Season
Makeup application is not just about dabbing multiple products on your face. Here is your crash course in makeup essentials and learn how to use your many products for maximum effect! The wrong steps and procedures can lead to major makeup failures, thereby bringing your makeup game down. You need to know whether what you’re doing is right or not. Here’s a step-by-step guide on how to layer products while doing your face makeup for oily skin in the monsoon.
1. Prep Your Face
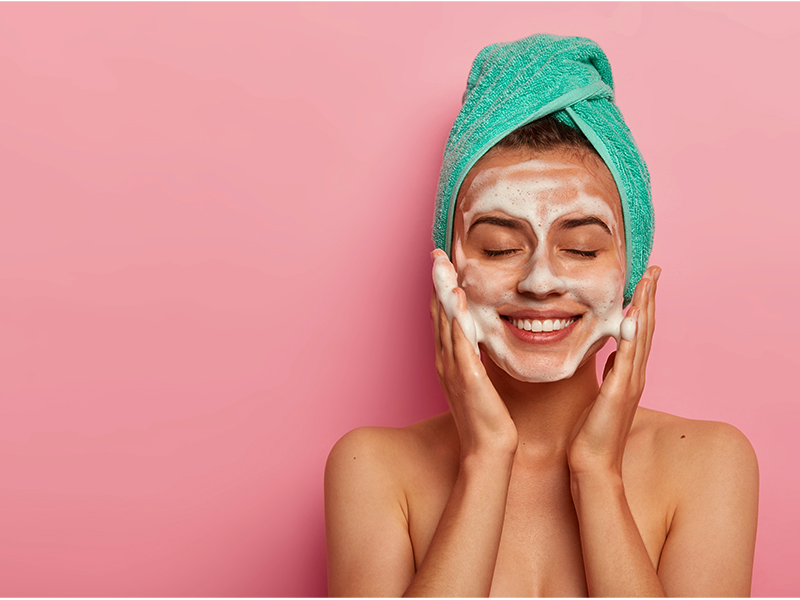
Cleansing, toning, and moisturising your skin is the foremost among all the makeup steps for oily skin. Use a salicylic formula as your cleanser, since it is ideal for people with oily skin. Cleansing should be followed by toning and moisturising. Buy an oil-free moisturiser from the Red Dot Shop here.
2. Primer Is A Must

You should never skip this step. It is very important to use a primer and you should get hold of the best primer for oily skin. For people with oily skin, this step is crucial because primers play a significant role in controlling the production of oil. Besides, it helps your skin look smoother and is very important for the retention of makeup on your oily skin.
3. Then Comes The Foundation

Once you have finished applying your primer, grab a blending sponge and apply your foundation very carefully. You must use only the best foundation for oily skin that is available in the market. If you wish to apply makeup daily, it would be better for you to opt for a BB or CC cream in place of foundation. Here is where you get to know how to find the perfect foundation shade, select a quality brand, and create a flawless base.
4. Hide Them All With Your Concealer

Once you have applied the best foundation for oily skin, you can conceal all the flaws on your skin with your concealer. Hide all your blemishes, acne marks, dark circles, or other marks with the help of an oily skin concealer.
5. High On Highlighter
Highlighting the high points of your face has the power to complement your makeup application. Before you start highlighting, map the areas on your face that you wish to highlight. To ace your highlighting game, sweep the product down the bridge of your nose, on your brow bone, the centre of your forehead and chin, the inner corner of your eyelids, above your lips and across the tops of your cheekbones. Here is all you need to know about how to choose and apply highlighters the right way. Watch this video to learn an amazing highlighter hack!
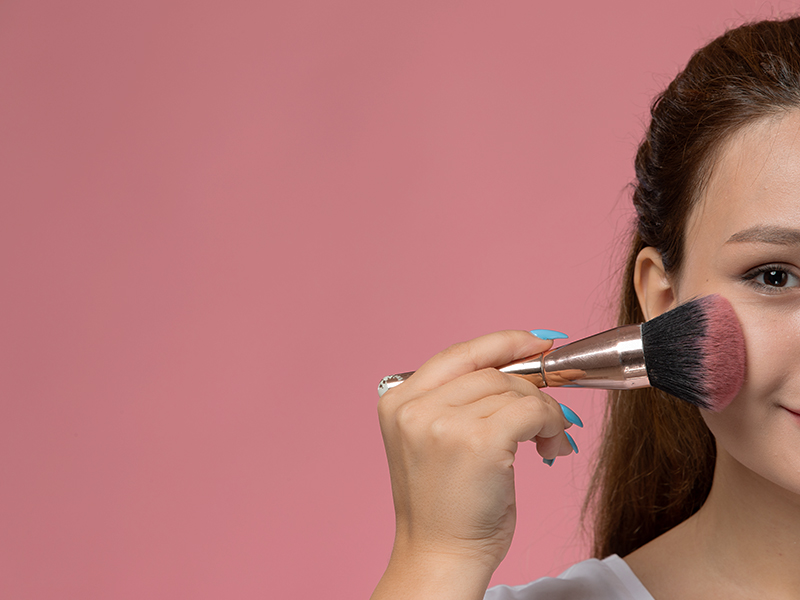
6. Contour Your Way To Sharpen Your Features

Contouring helps define or reshape your facial structures. The most popular areas to contour include along the hairline, sides of your nose and under your cheekbones (to achieve a chiselled jawline). Use an angled brush to blend it all in and see how your face makeup makes heads turn.
7. Setting Spray

Before the final touch, make sure to apply some setting spray. It will prevent your makeup from slipping off quickly. A setting spray will help in the retention of your makeup for a long time.
8. The Final Touch

Now, you are free to apply your blush, eyeliner, lipstick, and other beauty products to complete your look. Find a variety of amazing products on the Red Dot Shop here.
If you want to add a little more to your makeup look, check out this super easy eyeshadow tutorial. Click on the video.
5 DIYs For Oily Skin In Monsoon
Home remedies are easy, affordable and can be done at your own pace. Skincare is easy if you know your skin type well and can work around natural products to improve the quality of your skin. Here are simple home remedies for oily skin.
1. Aloe Vera

Aloe vera is known for its soothing properties and makes for an effective natural face pack for oily skin. You can buy aloe vera skin serum from the Red Dot Shop here, it helps moisturise skin and lighten blemishes.
Method:
- Take a dollop of freshly squeezed aloe vera.
- Apply raw aloe vera paste onto your clean and damp face before bedtime.
- Leave it on for the whole night.
- Rinse it off with warm water in the morning.
2. Tomatoes

One of the most basic fridge staples is tomatoes. They have an astringent effect and help reduce the oiliness in your skin.
Method:
- Make some juice out of 1 tomato & ½ cucumber.
- Strain the residue to get clear juice.
- Massage it onto your face and let it dry completely.
- Rinse it off with cold water.
3. Charcoal
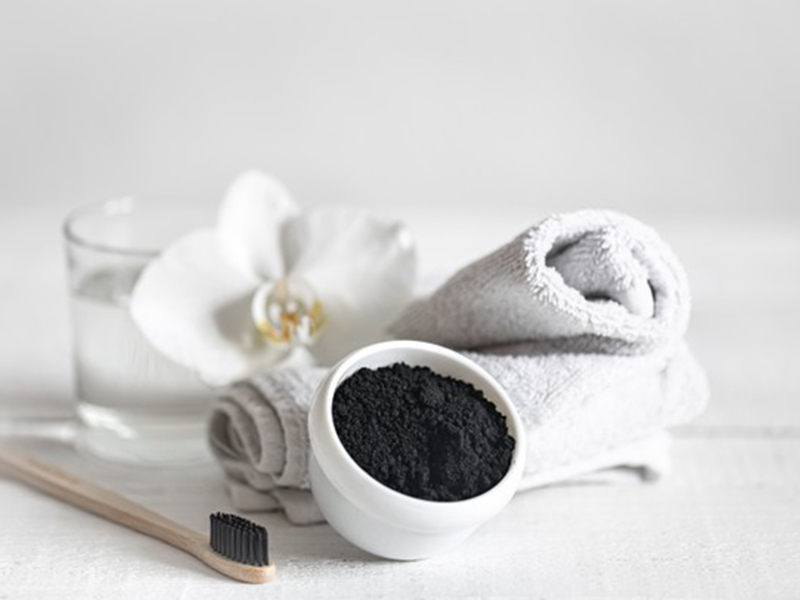
It is one of the best-known natural remedies for oily skin. Charcoal is a trending ingredient that gets quick results while still being gentle on the skin. Buy all-natural vegan activated charcoal soap here.
Method:
- Combine 2 teaspoons of water and 1-2 drops of essential oil (optional) in a bowl.
- Add 1 teaspoon of bentonite clay to the water-oil mixture. Allow it to absorb for a few minutes.
- Add 1 teaspoon of activated charcoal powder and ½ teaspoon of raw honey to the bowl. Combine all ingredients to form a paste.
- Gently massage the mix to your face in a circular motion.
- Rinse it off with warm water and pat dry.
4. Milk

This basic home ingredient makes for one of the best home remedies for oily skin and pimples.
Method:
- Take a portion of raw milk that is enough for your face.
- Dip your fingers and apply them to your face.
- Keep it on for a few minutes till it dries off.
- Rinse it off with warm water.
5. Lemon
The vitamin C in lemons makes your skin glow. Lemons also work as a natural toner for oily skin.
Method:
- Freshly squeeze out some juice of 1 lemon.
- Mix the lemon juice with 2 parts of water.
- Apply the mix to your face and let it dry out for about 10 minutes.
- Rinse it off with warm water.
5 Skincare Hacks That Work Like A Charm

To guide you through the beauty jargon on your quest for happy, healthy skin, here are 5 tips that will help transform your skin.
- Wash your skin daily. Rinse it once or twice a day. Use cleansing products that are suitable for your age and skin type. Try face wash from the Red Dot Shop here.
- Never go to sleep with makeup on. Learn here how to choose the right makeup removers and use it effectively for great results.
- Moisturise your skin. This will keep your skin glowing and remember that even oily skin needs a light moisturiser. Buy tea tree face cream from the Red Dot Shop here.
- Use sunscreen daily. Even on cloudy days, your skin is exposed to ultraviolet rays. Here is your ultimate SPF sunscreen guide.
- Apply eye cream at night. Choose one with vitamins A, C, E, and K. Buy an under-eye serum from the Red Dot Shop here.
5 Ways Of Cleaning Your Makeup Applicators
The variety of brushes on your vanity, your favourite beauty sponge and the collection of trendy makeup applicators speak volumes about your makeup skill and artistry. But what about the hygiene and cleanliness of these very makeup applicators? According to dermatologists and makeup artists, we should be cleaning up our tools far more often to prevent bacteria buildup, which can lead to breakouts. While soap and water work great for overall cleansing, makeup applicators differ and so do the methods to clean them up. Watch this video to learn how to keep your makeup brushes and sponges clean and bacteria-free with ease.
5 Affordable Makeup Dupes
Makeup is a different experience for everyone. But it brings confidence and defines your beauty even more. Buying makeup should not drain your savings. And this list of Indian brands will truly do the opposite. They are super affordable and would give you the makeup look you desire with ease!
1. PAC HD Foundation VS Anastasia Beverly Hills Luminous Foundation

Anastasia Beverly Hills Luminous Foundation is a water-resistant liquid foundation that creates a luminous, natural finish. But to give you a better pocket-friendly foundation is the PAC HD Foundation. The radiant formula delivers long-wearing, medium to full coverage yet still feels weightless and looks ultra-fresh. This lightweight foundation blurs any imperfection—including discolouration and unevenness—without caking or masking the skin’s natural radiance. The PAC Foundation is an everyday foundation that lasts up to 12 hours!
Price: Rs 875
2. Lakmé 9 To 5 Primer + Matte Lipstick VS Bobbi Brown Lip Colour
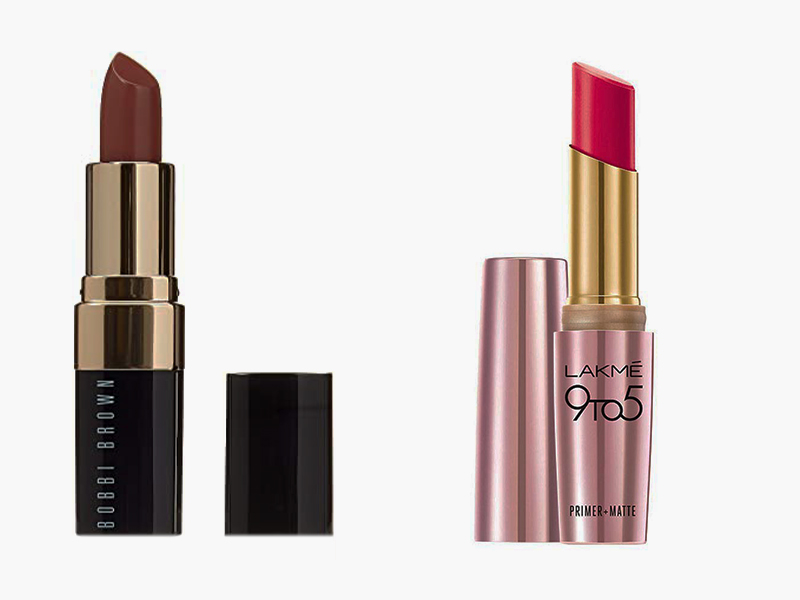
Bobbi Brown is a go-to for all makeup artists. It is smooth, lightweight, pigmented, and perfect. But the Lakmé 9 To 5 Primer + Matte Lipstick stays true to its name of being a long-lasting lipstick. It is soft and plush, with a beautiful mellow fragrance. The lipstick glides over smoothly, with a strong pigment. And the plus to it is, Lakmé 9 To 5 can also work as a cheek and eye tint!
Price: Rs 400
Did you know that your lipstick has multiple uses? Watch this amazing hack and learn how to use lipstick as an eyeshadow!
3. Kay Beauty Liner VS MAC Crayon Kajal Eyeliner

Everyone wants to try out different styles of eyeliner. Cateye and fox-eye are just the two popular eye trends around, and various eyeliner styles must be tested. And for that, you need good eyeliner. The MAC Crayon Kajal Eyeliner is a soft, creamy, smudge and waterproof liner. And so is the Kay Beauty Liner. It comes in various colours and is smudge-proof, transfer-proof and water-resistant. The eyeliner defines your eyes beautifully with a rich formulation of chamomile and eucalyptus extract. It is also a vegan, cruelty-free product!
Price: Rs 424
Struggling with applying eyeliner? Watch this video to learn 3 useful tips.
4. Nykaa Gloss It Up! High-shine Lip Gloss VS Sephora Outrageous Plump Gloss
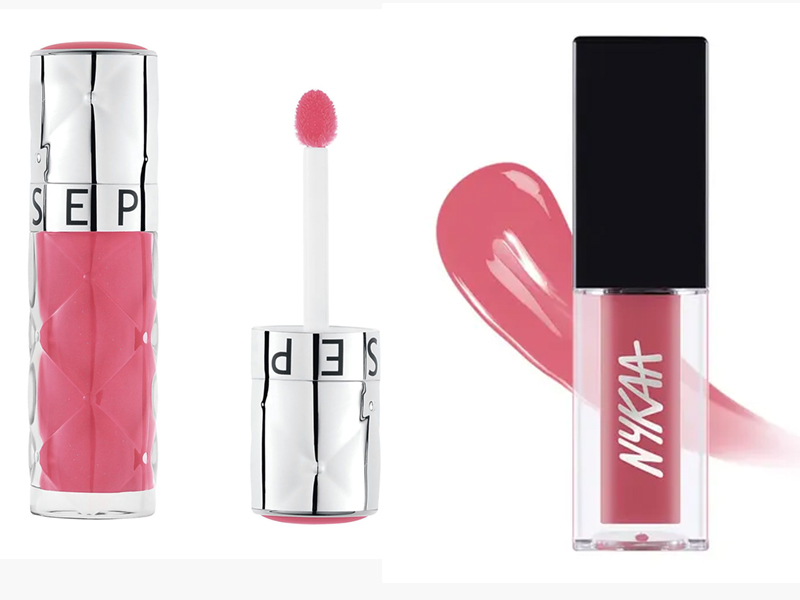
For a subtle sheen, a lip gloss is perfect. And the Sephora Outrageous Plump Gloss works perfectly in giving a subtle tint of colour and plumping your lips. But Nykaa Gloss it Up! High-shine Lip Gloss is a lip gloss that is sexy and comfy at the same time! Enriched with new light-magnifying technology, this lip gloss gives you absolute colour purity with a shine that is sure to steal the spotlight! Its cushiony formula hugs your lips to give you an irresistible juicy pout. It leaves no tacky and sticky residue and lasts for a perfect night out!
Price: Rs 360
5. Lotus Finish-Up Dewy Makeup Fixer VS Mist And Pixi Makeup Fixing Mist
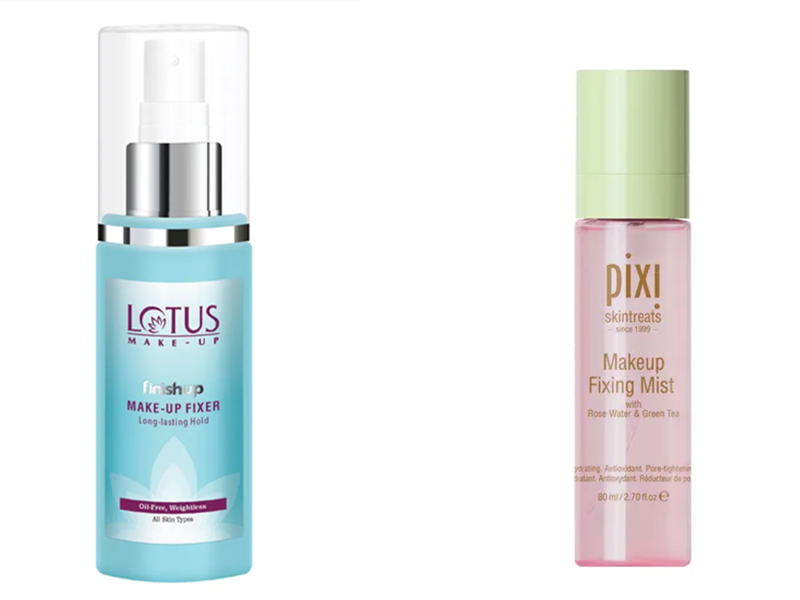
To finish off your makeup look, the Pixi Makeup Finishing Mist is beautiful. It is formulated with rose and green tea water to restore moisture and balance in the skin. Similar to the product is the Lotus Finish Up Dewy Makeup Fixer. It is a refreshing mist that locks in the makeup and boosts radiance. The lotus makeup spray is also cruelty-free and paraben-free.
Price: Rs 356
5 DIY Makeup Removers
You’ve already learned never to sleep with makeup on, now find 5 effective DIY makeup removers that will help cleanse the skin without using any chemical products. Learn effective steps that will help remove the makeup from your face with ease here.
1. Aloe Vera & Olive Oil Makeup Remover
For amping up the cleansing routine, ensure to add some aloe vera water with olive oil or any of your favourite oil. It is completely suitable for all skin types, and you will just need a bottle, of aloe vera water, and extra virgin olive oil. It is very helpful for sensitive skin and is one of the best homemade makeup removers.
How To Use It:
- Just fill up the aloe vera water in the bottle and add ⅔ of virgin olive oil.
- You will find the oil floating over the water so make sure to shake the mixture well and then soak the cotton pad with it.
- Clean the face with the formula gently and lightly.
2. Coconut Oil Makeup Remover
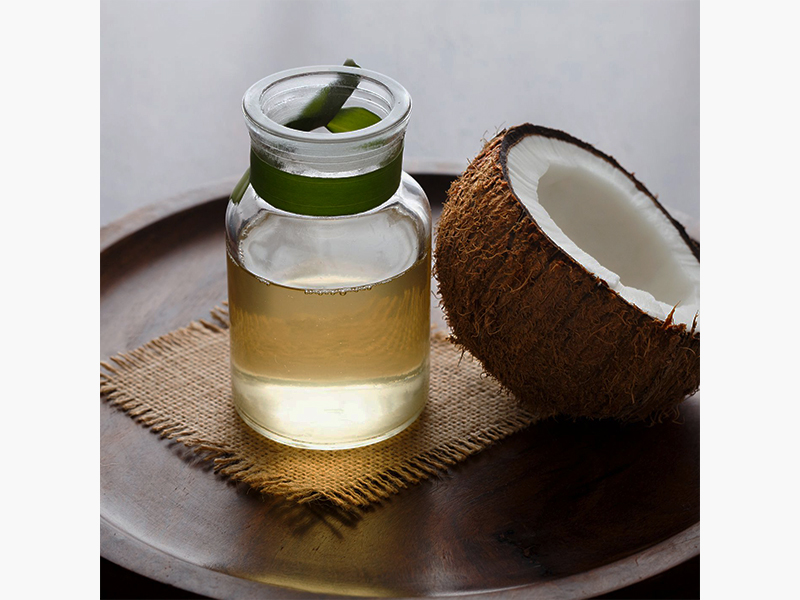
Coconut oil works as a brilliant item for breaking up the substances of the makeup that are water-resistant. It also helps to maintain the hydration of the skin. However, make sure to give a follow-up with a soap and water session for better cleansing. It is completely suitable for dry, dehydrated, and dull skin.
How To Use It:
- In a jar, pick out some coconut oil. Make sure it is in melted form.
- Further, rub the oil all over the eyelids, lashes, and face.
- Ensure to have enough oil for moving the fingers without tugging on the skin.
- Do not let the excess oil remain on the face and wipe it off.
- Use some warm water at the end to splash it on your face.
- This will act as a natural makeup remover, providing the skin little extra rest.
3. Baby Shampoo-Eye Makeup Remover

If you are worried about how to remove waterproof mascara, use the no-tears baby shampoo along with olive oil or coconut oil and water. It is suitable for all sensitive skin and eyes.
How To Use It:
- Pour down 1 tablespoon of baby shampoo into a container.
- Add ¼ teaspoon of olive oil and mix the solution well.
- Pour in some water to fill the bottle.
- Shake it well after the same and then dip a cotton pad in the mixture.
- Try to remove the eye makeup gently.
4. Witch Hazel Makeup Remover

It is one of the brilliant ways to remove makeup that is water and oil-based. It does not contain any irritating chemicals and will help remove the makeup and will also help reduce the building up of the pores. It is suitable for oily, sensitive, and dry skin. All you require is sweet almond oil, witch hazel, extra virgin olive oil, a small bottle, and purified water.
How To Use It:
- Pour down 4 tablespoons of the witch hazel along with 2 tablespoons of sweet almond oil.
- Add to the solution 2 tablespoons of extra virgin oil.
- Shake the ingredients well, and then add 3 tablespoons of purified water.
- Shake the ingredients well so that they can blend properly.
- Using a cotton pad, wipe your face with the solution.
- The solution will work much better than the Maybelline makeup remover.
5. Jojoba & Rose Makeup Remover

Better than the Garnier makeup remover is jojoba oil which acts as a natural makeup remover. It helps better in moisturising, nourish, and soothing the skin, helping the same look fresh and radiant. It is completely suitable for all skin types, and you just need some jojoba oil, rose water, and a glass bottle to prepare the solution.
How To Use It:
- Fill most of the bottle with rose water.
- Add ½ cup jojoba oil to the same bottle.
- Shake the bottle well.
- Using a cotton pad, remove the makeup without much effort.
Whether stress from work has given way to ageing fears or the royal family drama has awakened acne breakouts or your hair isn’t cooperating, this guide has got you covered. With the right regime and a healthy diet, you can get your desired skin and hair quality. Put your knowledge about what your skin needs and these amazing hairstyling techniques to use and look your best!